[React, Typescript] 채팅 프론트엔드 구현 (3편)
오늘은 마지막 단계인,
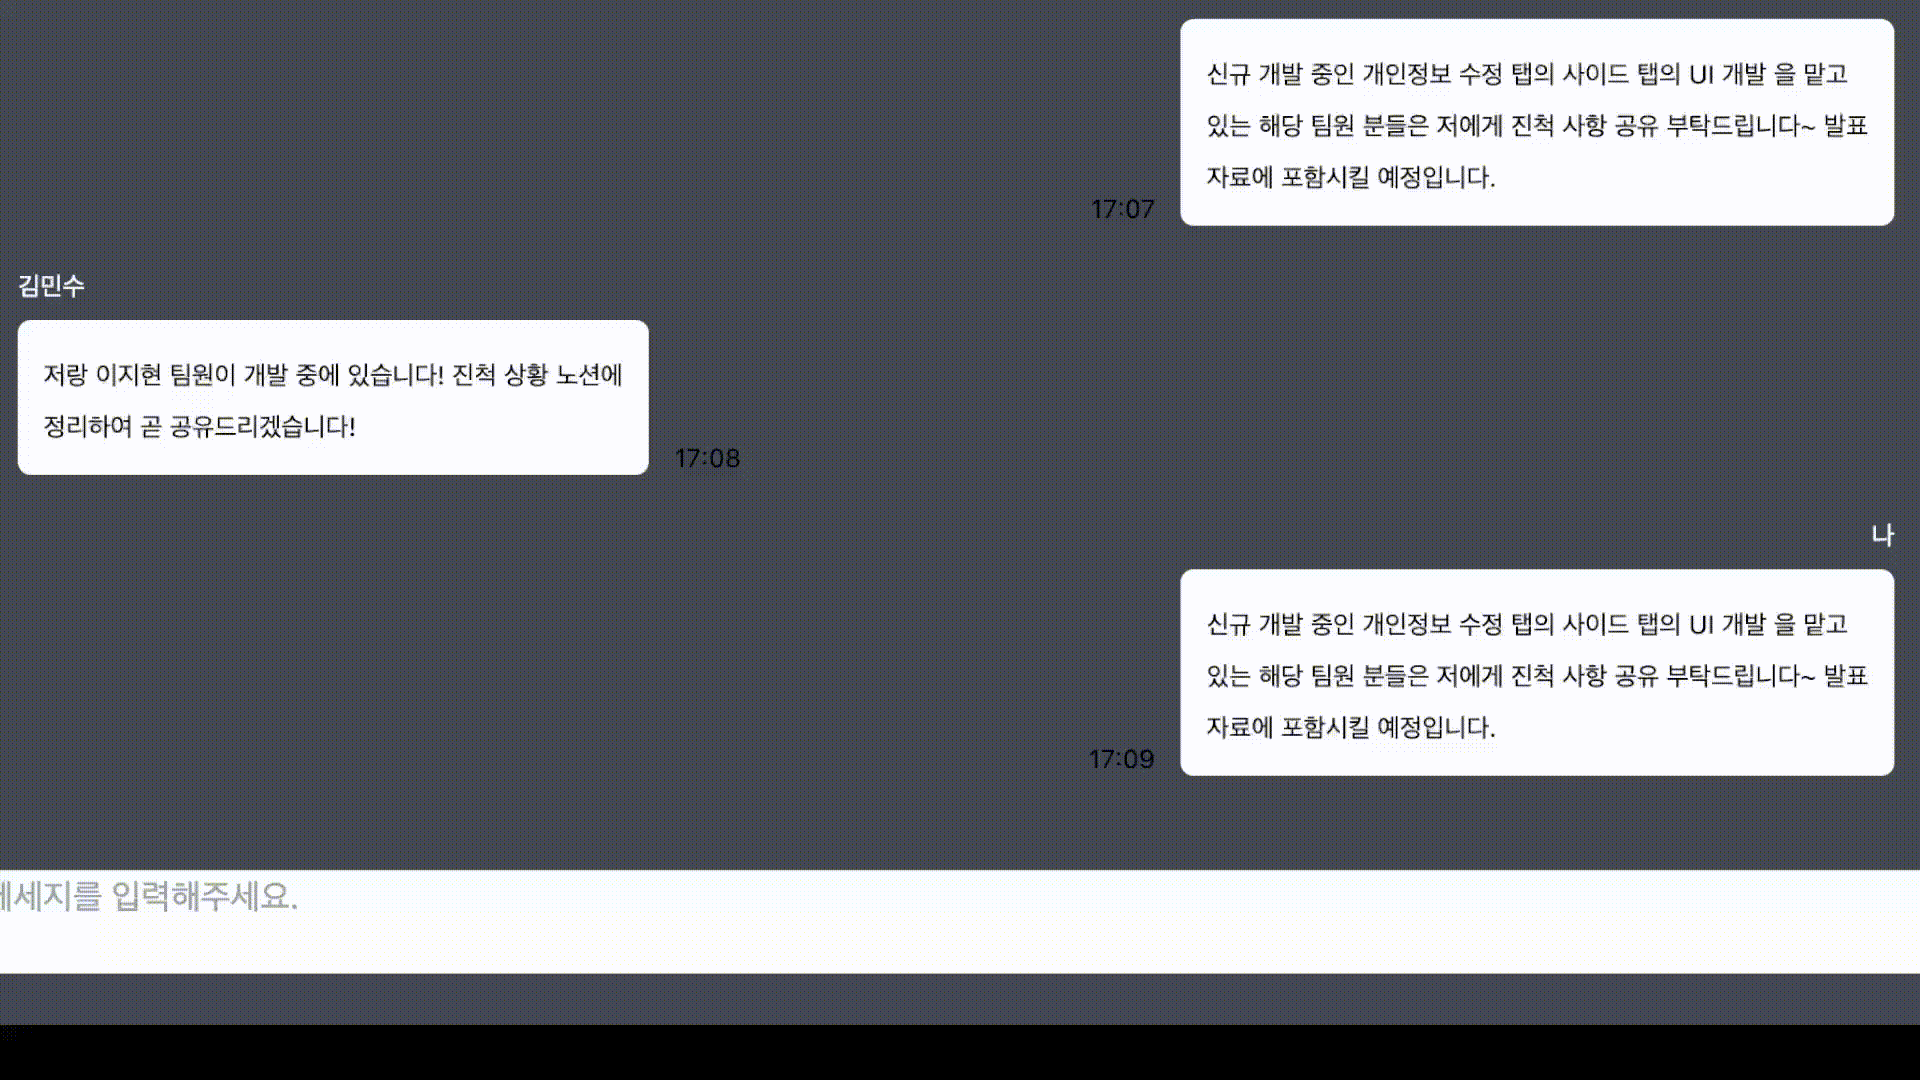
5. 채팅 데이터에서 채팅 내용이 개행됐을 경우, <br/>처리를 통해 화면에서도 개행 처리 해줌.
6. 조합문자(아직 완성되지 않은 문자, 예를 들어 한글, 중국어, 일본어 등)을 사용할 경우, 채팅 입력 시 마지막 글자가 중복 처리되는 것을 막기 위해, 조합상태를 감지하는 로직 구현.
부분을 구현하는 과정을 포스팅하려고 한다.
5. 채팅 데이터에서 채팅 내용이 개행됐을 경우, <br/> 처리를 통해 화면에서도 개행 처리 해줌.
messages 상태변수의 채팅 데이터에서 채팅 내용이 개행됐을 때, '\n'을 <br/> 태그로 변경처리하여 실제 채팅 컴포넌트 화면에서도 개행처리가 될 수 있도록 설정해줄 것이다.
ChattingComponent.tsx 파일에 formatMessage라는 메세지 포멧팅 함수를 정의한다.
import React, {useState, useRef, useEffect} from "react";

function ChattingComponent({nickname, chatting, time, isMe}: any) { //props로 받아올 데이터
  ...

  //메세지 포맷팅 함수 정의 (개행 문자를 <br/>로 변환)
  const formatMessage = (text: string) => {
    return text.split("\n").map((line, index) => (
      <React.Fragment key={index}>
        {line}
        <br />
      </React.Fragment>
    ));
  };

  return ( ... );
}

export default ChattingComponent;
이제, return 구간에 chatting props를 방금 만든 formatMessage() 함수 안에 넣어서 실제 화면에서 개행처리 될 수 있게 처리해준다.
import React, {useState, useRef, useEffect} from "react";

function ChattingComponent({nickname, chatting, time, isMe}: any) { //props로 받아올 데이터
  ...

  //메세지 포맷팅 함수 정의 (개행 문자를 <br/>로 변환)
  const formatMessage = (text: string) => {
    return text.split("\n").map((line, index) => (
      <React.Fragment key={index}>
        {line}
        <br />
      </React.Fragment>
    ));
  };

  return (
  	<>
    	{/* 채팅 입력한 사람이 나(본인)인 경우 : 채팅 입력한 사람이 타인인 경우 */}
        {isMe ? (
        {/* Tailwind CSS에서 justify-end는 오른쪽 정렬을 뜻함. */}
        <div id="me" className="flex justify-end my-5">
          <div id="time" className="flex flex-col justify-end mr-3">
            <p className="text-xs text-black">{time}</p>
          </div>
          <div className="mr-3">
            <div id="nickname" className="flex justify-end">
              <p className="text-xs text-white">{chatNick}</p>
            </div>
            <div id="chatting" className="p-3 bg-white rounded-md mt-2">
              <span className="text-xs text-black">
                {formatMessage(chatting)}
              </span>
            </div>
          </div>
        </div>
      ) : (
      	{/* CSS 기본정렬은 왼쪽이므로, justify-end 삭제. */}
        <div id="you" className="flex my-5">
          <div className="ml-3">
            <p id="nickname" className="text-xs text-white">
              {chatNick}
            </p>
            <div id="chatting" className="p-3 bg-white rounded-md mt-2">
              <span className="text-xs text-black">
                {formatMessage(chatting)}
              </span>
            </div>
          </div>
          <div id="time" className="flex flex-col justify-end ml-3">
            <p className="text-xs text-black">{time}</p>
          </div>
        </div>
      )}
    </>
  );
}

export default ChattingComponent;
완성이다.
6. 조합문자(아직 완성되지 않은 문자, 예를 들어 한글, 중국어, 일본어 등)을 사용할 경우, 채팅 입력 시 마지막 글자가 중복 처리되는 것을 막기 위해, 조합상태를 감지하는 로직 구현.
우선, 조합상태감지 로직을 구현하기 전, 조합문자가 무엇인지 설명이 필요할 것이다.
조합문자란, 아직 완성되지 않은 문자로, 여러 키 입력이 조합되어 최종문자가 만들어지는 과정을 뜻한다.
조합문자의 대표적인 예로는 한글, 중국어, 일본어가 있다.
조합상태감지 로직이 필요한 이유는, 영어와 같은 알파벳 문자는 받침이 없기 때문에 알파벳 입력 시 바로 문장이 마무리 되지만,
조합문자의 경우 받침이 있기 때문에, 예를 들어서 한글을 입력했을 때 문장이 완전히 끝났다고 판단하지 않기 때문이다.
그래서, 알파벳을 입력했을 때완 다르게, 조합문자를 입력 후 엔터를 누르면 맨 마지막 글자가 한번 더 중복되는 현상을 확인할 수 있다.
이를 위해 조합상태감지 로직을 구현해줘야 한다.
Home.tsx 파일에 조합상태감지를 위한 상태변수와 함수를 useState로 정의하고, 이를 각각 handleCompositionStart 함수와 handleCompositionEnd 함수에 적용시켜준다.
그리고 이 두 함수를 textarea의 onCompositionStart 이벤트와 onCompositionEnd 이벤트에 각각 적용시켜준다.
// Home.tsx
function Home() {
...
const [isComposing, setIsComposing] = useState<boolean>(false);
...
//입력 구성 시작 핸들러
const handleCompositionStart = () => {
setIsComposing(true);
};
//입력 구성 끝 핸들러
const handleCompositionEnd = (
e: React.CompositionEvent<HTMLTextAreaElement>
) => {
setIsComposing(false);
setInput(e.currentTarget.value);
};
return (
...
<textarea
className="w-full h-12 mx-3 focus:outline-none resize-none flex-1"
style={{ resize: "none" }}
placeholder="메세지를 입력해주세요."
onKeyDown={handleKeyDown}
onKeyUp={handleKeyUp}
onCompositionStart={handleCompositionStart}
onCompositionEnd={handleCompositionEnd}
/>
<button onClick={handleSendMessage}>
입력
</button>
...
)
}
여기까지 마쳤으면 우리가 원하는 완벽한 형태의 채팅창을 구현할 수 있다.
채팅창 포스팅은 여기서 마치도록 하겠다.
끝..!